Installers: Foundation Trench Grounding That Meets NF C 15-100
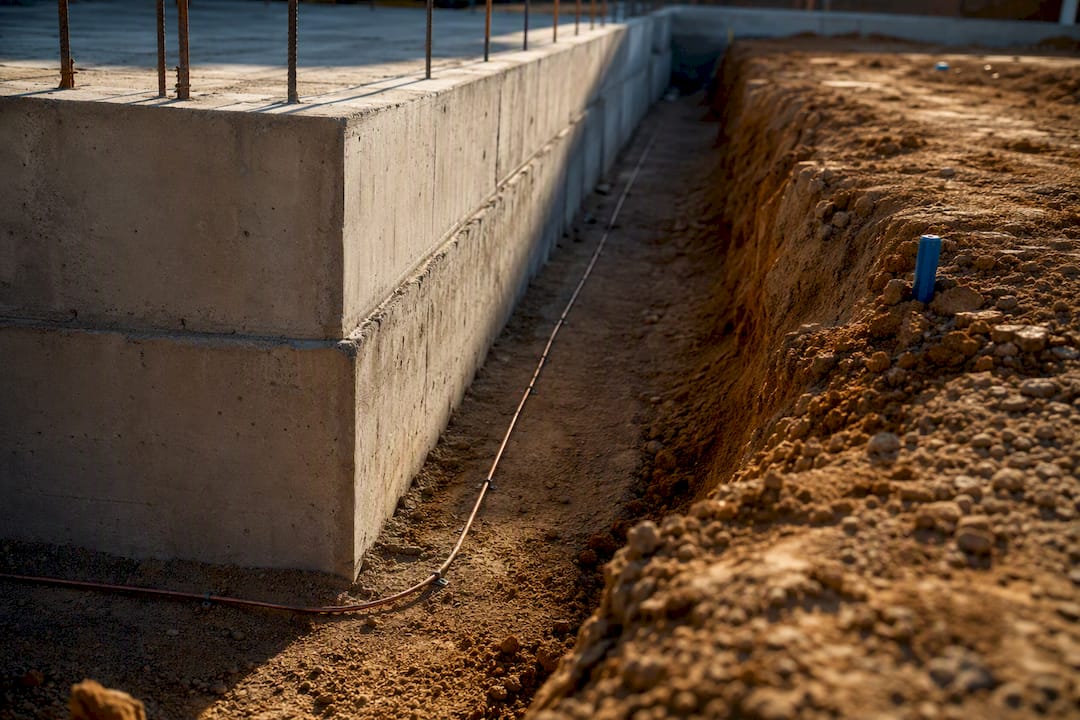
For new construction, the recommended earthing method is a perimeter foundation-trench loop, or boucle à fond de fouille. Confirm the result afterward with an accessible barrette de coupure and a tellurometer test.
TL;DR:
- The perimeter foundation-trench grounding loop must be at least 20 meters long and buried below the frost line, ideally deeper than one meter in moist soil.
- Conductors should be made of bare copper or galvanized steel with minimum cross-sections of 25 mm² and 95 mm² respectively, and must be connected with corrosion-resistant clamps.
- Soil contact is crucial for a reliable loop, and gravel or mâchefer backfill should be avoided around the conductor to prevent high resistance.
- Testing resistance requires a disconnect point and soil measurements, with resistance values highly affected by soil moisture and resistivity.
- Retrofitting with vertical piquets is recommended for existing structures, but complex or resistive sites often require specialist deep earth grounding or certification services.
Table of Contents
- What Is a Foundation-Trench Grounding Loop?
- Which Conductors and Sections Are Allowed?
- How Deep Should the Loop Go for Reliable Performance?
- How Do You Measure and Document the Result?
- When Does a Loop Fail and What Do You Do About It?
- Indelec’s Take: When Site Conditions Call for Specialist Help
- A Note on Safety and Documentation
- Need a Site Survey or a Certified Measurement Report?
- Sources
What Is a Foundation-Trench Grounding Loop?
A boucle à fond de fouille is a bare conductor laid around the perimeter of a building’s foundation trench before the concrete pour, forming a continuous ring electrode that ties into the main earth terminal. It is the standard method Promotelec recommends for new builds, since the excavation is already open and the trench gives you a clean, low-resistance path into undisturbed soil. The alternative, vertical piquets (ground rods), works better as a retrofit when a slab is already poured and re-excavation isn’t practical.
Here’s the installation sequence that keeps a boucle compliant and durable:
- Route the loop before concrete work begins. Lay the conductor in the trench along the outside perimeter, ideally beneath the future concrete propreté layer, keeping it clear of the footing itself following this checklist instalare cabluri.
- Target a depth of at least 1 meter where terrain allows. Shallower placement (down to about 60 cm) is workable, but deeper burial resists seasonal moisture swings better.
- Mark every conductor exit point. Each riser that will eventually connect to the barrette de coupure needs a visible marker or stake, because trench work gets covered fast and forgotten faster.
- Protect exposed runs from impact. Wherever the conductor crosses under a future slab edge or near rebar cages, sleeve it or route it clear of foot traffic and machinery.
If you’re working on an existing structure, instead skip the loop. Vertical piquets driven 1 to 2 meters deep, spaced far enough apart to avoid overlapping resistance zones, or a separate shallow trench dug specifically for the electrode, are the preferred retrofit approach when foundation excavation isn’t an option. Multiple piquets in parallel are common on sites with poor soil conductivity, since combining electrodes lowers the overall resistance more reliably than lengthening a single rod.
Which Conductors and Sections Are Allowed?
NF C 15-100 sets the minimum cross-sections for foundation-trench electrodes, and there’s no flexibility here. Undersized conductors corrode faster and measure worse on day one.
- Bare copper: minimum 25 mm².
- Galvanized steel: minimum 95 mm², typically supplied as strap (feuillard) rather than round cable.
- Lead-sheathed conductor: minimum 35 mm².
- Minimum loop length: around 20 meters, adjusted upward on resistive soils.
Connections at risers and at the barrette should use corrosion-resistant clamps, stainless or tinned bolts, and where copper meets galvanized steel, a bimetallic connector to prevent galvanic corrosion at the joint. Never substitute a metallic water or gas pipe as your earth electrode. Beyond the obvious code violation, utility pipes get replaced with plastic sections during renovations, and your “ground” disappears without warning.
Pro Tip:Keep a spare length of the same conductor and connector hardware on site during the pour. If a riser gets damaged by a concrete truck or a rebar crew, you want an identical splice ready, not a mismatched fix improvised on the spot.

How Deep Should the Loop Go for Reliable Performance?
Depth and soil contact decide whether your loop performs on paper or in practice. Bury the conductor below the base of the foundation footing, and push for at least 1 meter below grade where the terrain permits it. That depth puts the electrode below the frost line in most regions, and burial below the frost line in consistently moist soil gives the resistance reading long-term stability instead of a value that drifts every winter.
Direct contact with natural soil is non-negotiable. Gravel, crushed stone, or mâchefer backfill around the conductor creates a high-resistivity pocket that undermines an otherwise correctly sized installation. Soil contact is the detail crews skip most often, and it’s also the single most common reason a properly sized loop still measures poorly.
Keep these placement rules in mind on site:
- Route the conductor independently from the rebar cage. Rebar gets its own intentional bond to the main terminal; it should never double as your primary electrode.
- If gravel backfill is structurally unavoidable in one section, maintain a continuous strip of natural soil or engineered low-resistance fill in direct contact with the conductor.
- Bring the conductor up to the barrette without ever clamping or welding it to structural steel along the way.
How Do You Measure and Document the Result?
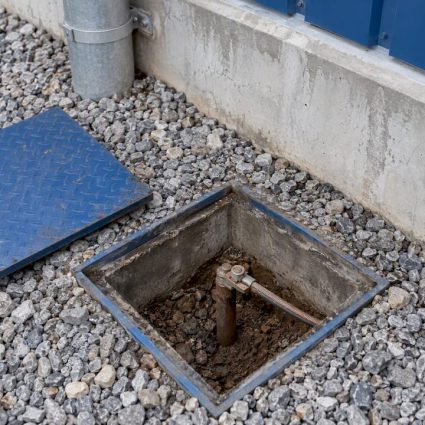
The barrette de coupure is the point where the electrode disconnects from the rest of the earthing system for testing. It has to stay reachable after the building is finished, which means planning its location before the walls go up, not after. Plan the barrette’s location early and mark it clearly, because it routinely ends up buried behind meter cabinets or landscaping when nobody flags it during construction. A dual-part barrette, separating the high and low sides, makes isolating the electrode for a test simple and safe without disturbing the rest of the bonding network.
Testing itself follows a standard three-point method:
- Disconnect the electrode at the barrette to isolate it from the installation.
- Drive two auxiliary electrodes into the soil at set distances from the loop, in a straight line away from the building.
- Run the tellurometer test between the electrode and the two auxiliary probes to get a resistance reading, then reconnect the barrette once the reading is recorded.
Soil resistivity drives the result more than conductor size does. A rough guide, R ≈ 2ρL, lets a designer estimate expected resistance from the local resistivity ρ before deciding whether remediation is needed.
| Site condition | Typical remediation |
|---|---|
| High soil resistivity (rocky, sandy, or very dry soil) | Add piquets in parallel or extend loop length |
| Loop length under 20 m | Extend the run before final connection |
| Backfill contains gravel or mâchefer | Replace with natural soil contact strip |
Record the measured value, test date, electrode spacing, and weather/soil moisture conditions in a compliance file. Resistance readings shift with moisture, so a single test on a dry August afternoon tells you less than a value paired with context.
When Does a Loop Fail and What Do You Do About It?
The decision rule is simple: loop for new construction, piquets or a separate trench for anything already built. Most failures trace back to a short list of repeat offenses.
- Conductor buried too shallow, above the frost line, where seasonal freeze/thaw destabilizes the reading.
- Gravel or mâchefer backfill breaking soil contact.
- Conductor accidentally bonded to rebar instead of routed independently.
- Barrette buried or blocked, making retesting impossible without demolition.
- Loop length under the 20-meter guideline on resistive soil.
Pro Tip:If a measured resistance comes back high despite correct sizing and depth, don’t default to a longer loop first. Check soil contact and backfill composition. That’s the cheaper fix and the one most often responsible.
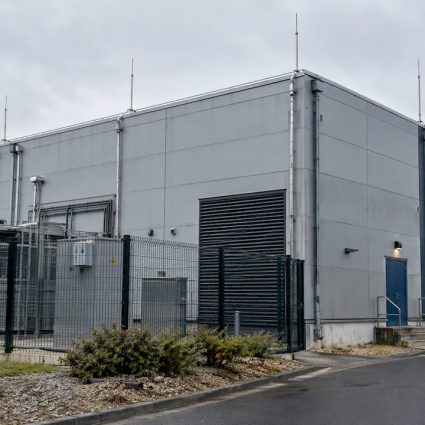
Call a specialist when resistivity is unusually high, the structure is large or complex (industrial buildings, multi-wing sites), or the project requires formal certification for insurance or regulatory sign-off.
Indelec’s Take: When Site Conditions Call for Specialist Help
Not every grounding job stays within DIY territory. On resistive soils, or structures where a standard loop can’t hit target values, deep earth grounding drilling reaches conductive layers a surface loop never touches.
Before hiring a contractor, ask direct questions:
- What measurement method will you use, and will I get a documented test report?
- What’s the corrosion protection plan at every connector and splice?
- Will the barrette de coupure remain accessible after finishing work?
- What warranty backs the installation?
Specialist intervention pays for itself fastest on high-resistivity sites, large industrial footprints, and any project that needs formal certification.
A Note on Safety and Documentation
Grounding work looks simple until a poorly documented barrette forces a demolition job three years later to retest a system nobody can locate. Treat the barrette’s accessibility and the test report with the same seriousness as the conductor sizing itself. A resistance value without a recorded date, soil condition, and electrode layout isn’t really documentation, it’s a guess with a number attached.
— INDELEC
Need a Site Survey or a Certified Measurement Report?
Specialist providers run deep earth grounding drilling for sites where a surface loop can’t reach target resistance, plus measurement, certification, and installation supervision for teams that want a documented, standards-aligned result instead of a guess. That combination matters most on resistive soils and larger structures, where a DIY loop often falls short and a redo costs far more than doing it right the first time.

If your project involves a lightning protection system alongside grounding work, Indelec’s installation, risk assessment, and certification services cover both scopes under one point of contact. Get in touch for a site survey or a measurement report before your foundation trench closes for good, once concrete goes down, your options narrow fast.
Sources
- Promotelec FAQ — How to install a foundation-trench loop
- IZI by EDF — foundation-trench earth electrode advice